The Libryo Assess module is an easy-to-use tool that allows you to conduct self-assessments to ensure that you are compliant with your requirements. Now you can create your own assessment items and link them to existing requirements on your legal register or to any documents in the platform. This guide will walk you through the process of creating, managing and deleting the assessment items created by yourself on your Assess module.

How to Create a New Assessment Item
1. Go to Assessment Items on the Assess module.

2. Click on the "Create" button.

3. Fill in the required fields, such as the Title of the assessment item, the Category, the Control Topic and choose a Risk Rating. Click "Save".

Note: You will receive a confirmation message, alerting you that the Assessment Item you created will appear in all other Libryo Streams in your organisation, but will only change from being a 'Draft' if someone else in the organisation changes its status.

4. Once the assessment item is created, you can see its information such as the Risk Rating, the Due Date, when it was Last Answered and by whom it was created. After Current Answer, you can also assess it by providing an answer such as "Yes", "No" or "Not Applicable".
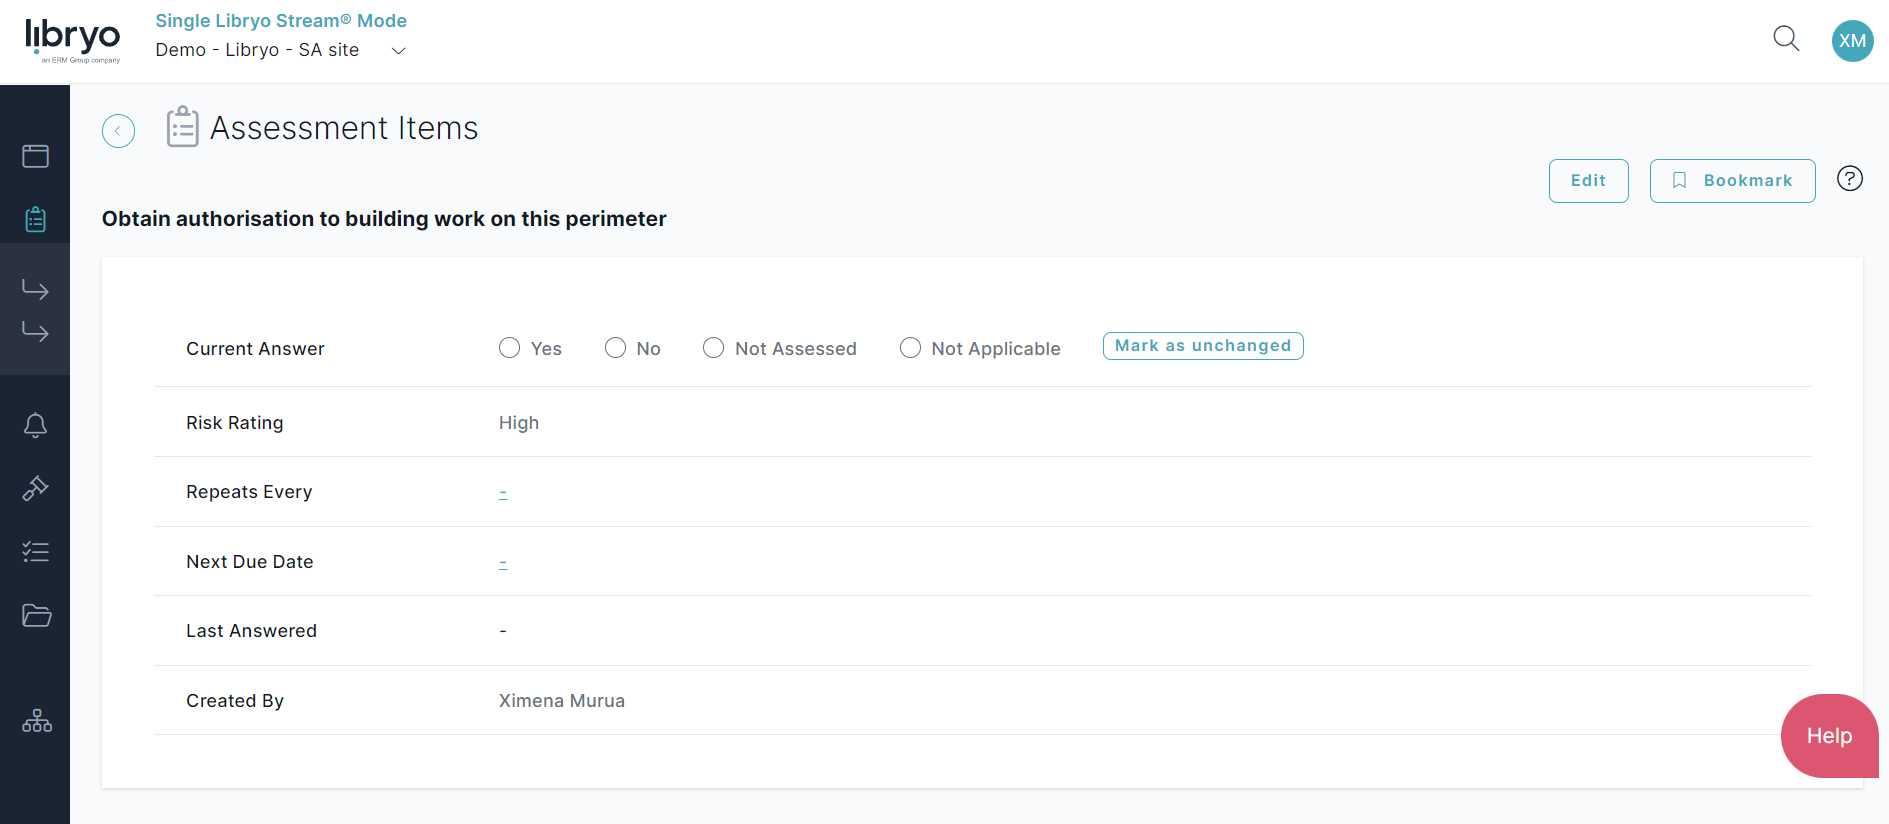
5. If you need to, click "Edit" to change any of the Assessment Item information. 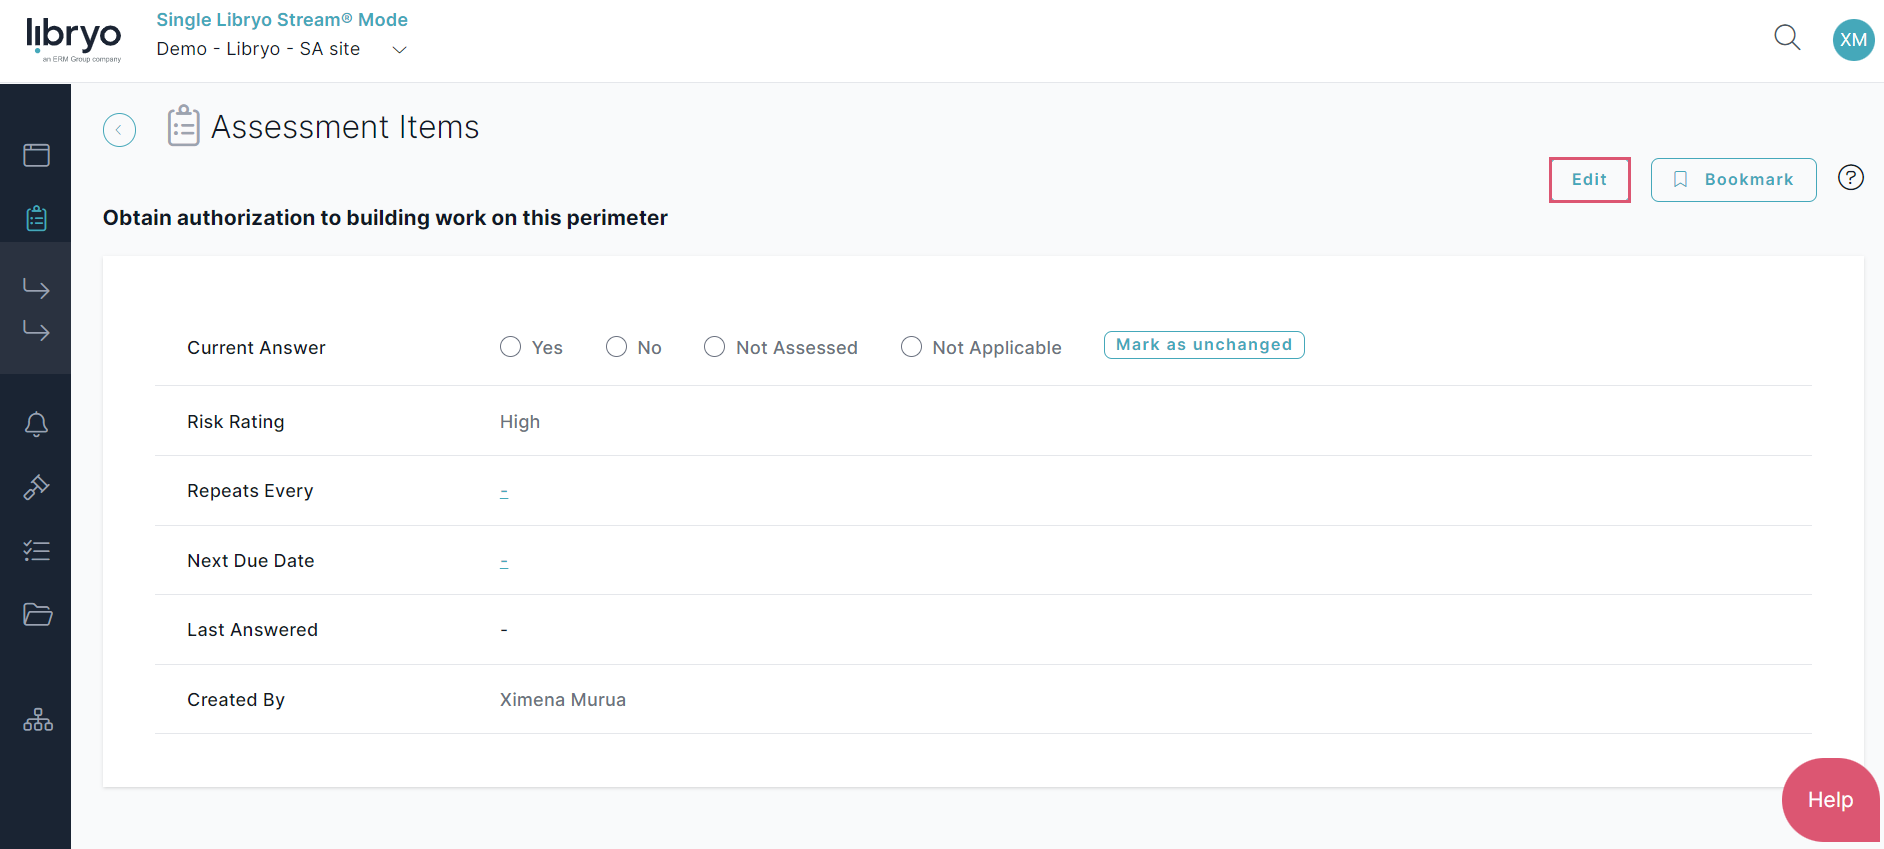
6. Make the changes you need and then click "Save".

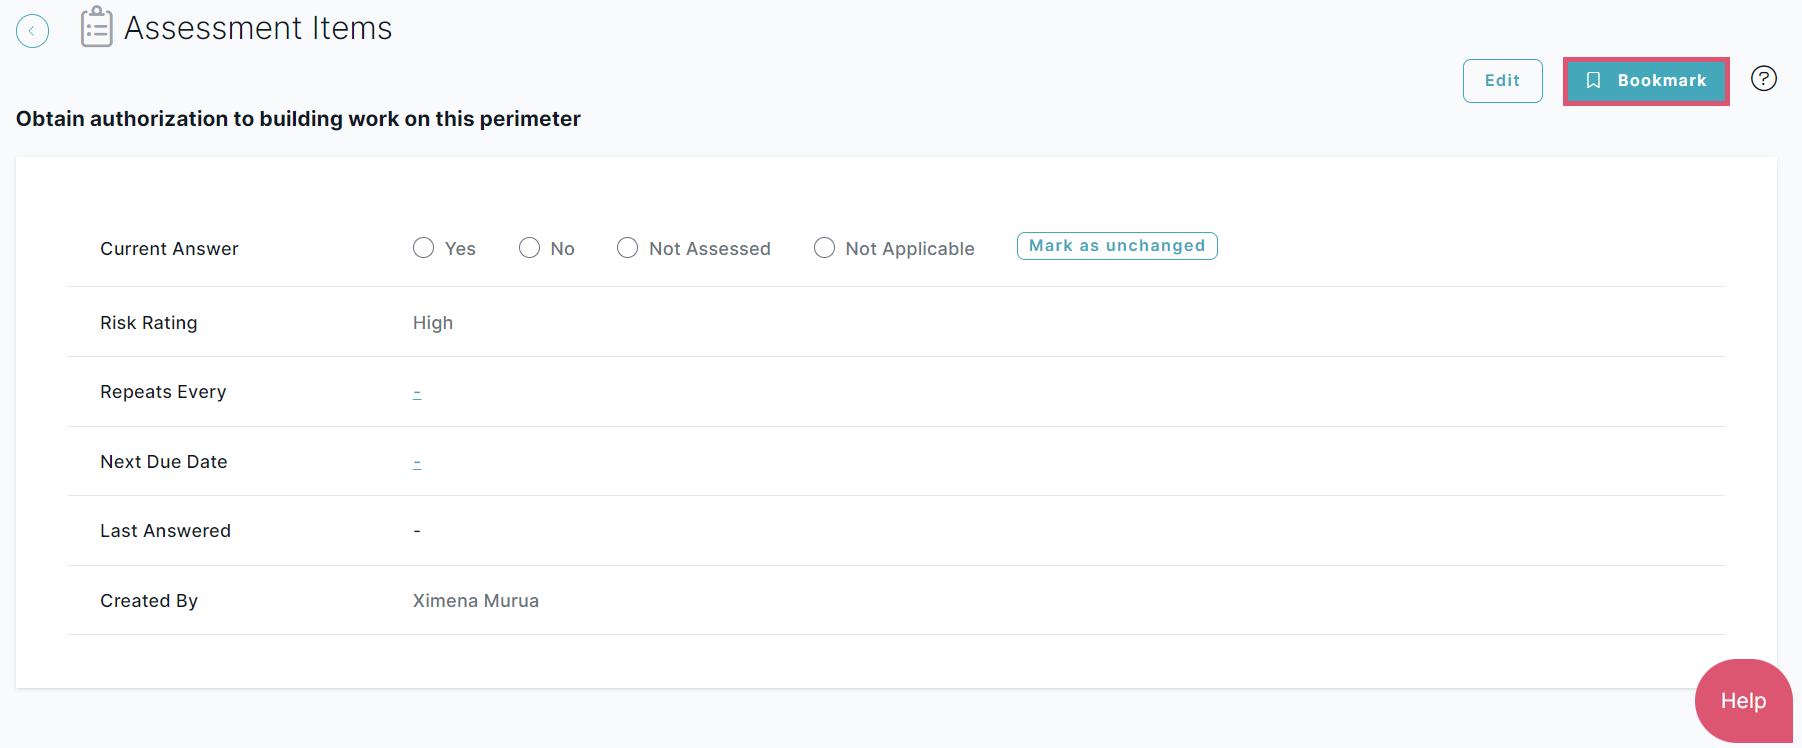
7. If this is an Assessment Item of extreme importance to you, you can Bookmark it and it will always be at hand.
8. If you need to create a Task for this Assessment Item, just click on "Create Task" and enter the details of the task to be added.

9. Finally, you can also add comments on this assessement item, tagging co-workers who should be aware of this. Just type your comment and click "Post".

How to Add a Requirement to the Assessment Item
Once you create an Assessment Item, you can link it to an Requirement from your Legal Register, to demonstrate which regulation originated that specific assessment item. To do so is quite simple, just follow these simple steps:
1. On the newly created Assessment Item page, click on "Add Requirements".

2. In the pop-up window that opens, start typing the title of the document you want in the "Select Requirement Document" field until you find the required document. Then choose the required Requirement and click "Save".

3. The requirement will be linked to this assessment item and will appear on the item's details page every time you access it. Note that you can add as many requirements as you wish, and they will all be linked to the assessment item and show up here. 
How to Upload Files to the Assessment Item
In addition to legal requirements, companies may have specific directives, policies, and standards that they need to comply with. To help manage these requirements, our tool allows you to create assessment items and link them to relevant documents. This gives you the freedom to link your assessment item to policies, directives, and standards of your choice, not just legal requirements. By doing so, you can ensure that your assessments cover all relevant requirements and that your company remains compliant with all applicable regulations and internal standards. To do so, you just have to follow these simple steps:
1. On the newly created Assessment Item page, click on "Upload Files".

2. Select a Drive Folder to upload the file to and then select the files to upload. 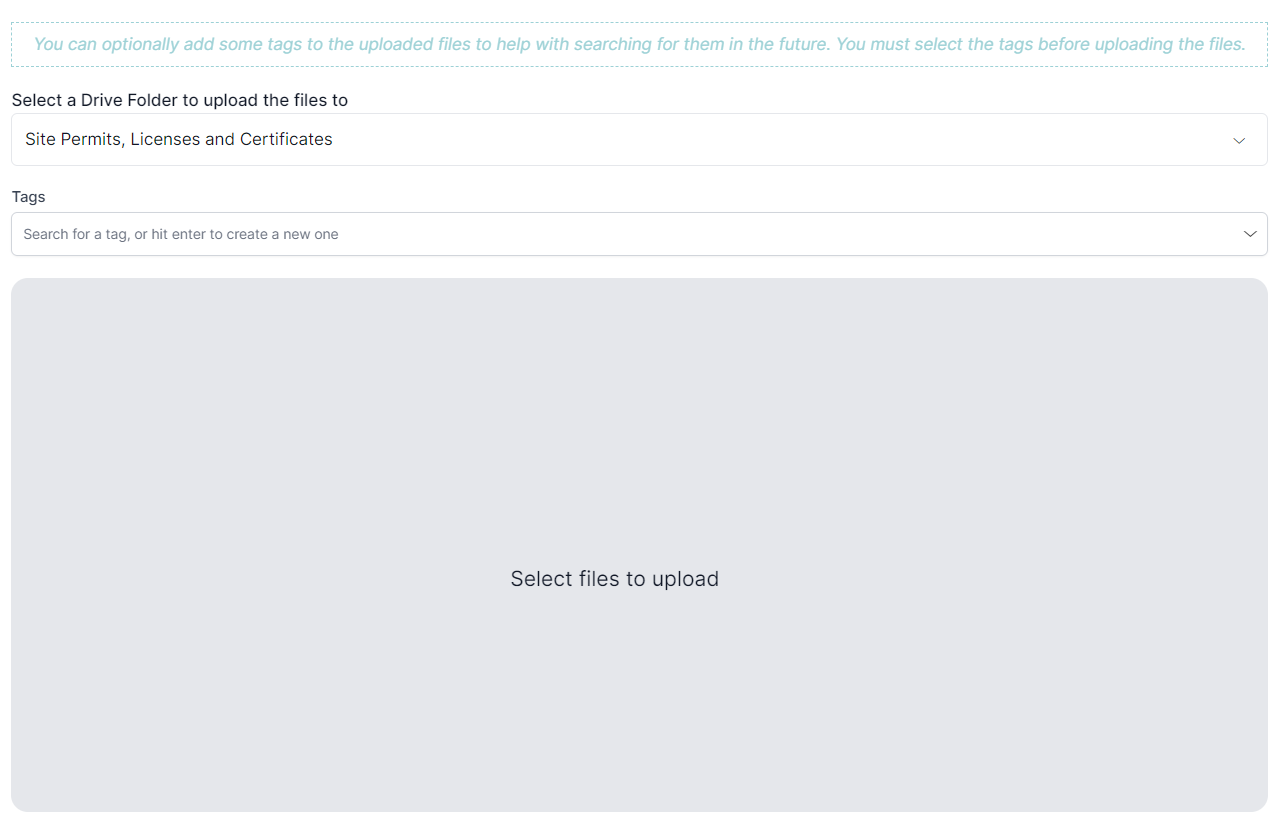
Have any questions?
At Libryo, we really want all our users to get the most from our system. We hope that this article was useful. If you still have some questions, please contact us.